 Skip to content
Looking to upgrade your home security without hiring a professional? Installing a wireless home security camera system is one of the easiest and most effective ways to protect your property – and it’s something you can do yourself. Thanks to advances in smart home technology, setting up a wireless camera system is more straightforward than ever.
In this guide, we’ll walk you through how to install wireless security cameras at home, from choosing the right equipment to setting everything up for smooth, 24/7 protection.
Why Go Wireless for Home Security?
Wireless home security cameras offer several key benefits compared to traditional wired systems:
- Easy Installation: No drilling through walls or running wires through your home.
- Flexible Camera Placement: Mount cameras wherever you need them – indoors or outdoors – without worrying about power or cable access.
- Smart Integration: Many models work with Alexa, Google Home, or other smart home systems for seamless control and real-time alerts.
- Remote Monitoring: Check your live feeds and receive motion alerts right from your smartphone, wherever you are.
If you’re looking for a DIY home security solution, wireless cameras are a top choice.
What You’ll Need to Get Started
Before installation, gather everything you need:
- Your wireless home security camera kit
- A strong and stable Wi-Fi connection
- Mounting hardware (usually included)
- Basic tools like a drill or screwdriver
- A smartphone or computer to set up the system
Also consider your specific needs:
- Indoor vs. outdoor cameras
- Video resolution (look for at least 1080p)
- Field of view and night vision
- Battery-powered vs. wired (for power only)
Choosing the right gear upfront makes the installation process much smoother.
How to Install Your Wireless Home Security Cameras
1. Plan Where to Place Your Cameras
Strategically place cameras to maximize visibility and security coverage. Focus on:
- Entryways (front, back, garage doors)
- Driveways and walkways
- Main living areas or hallways
- Areas with high-value items (like home offices or basements)
For wireless outdoor security cameras, mount them under eaves or awnings to protect them from the weather. Also, test Wi-Fi signal strength in each location to avoid connection issues later.
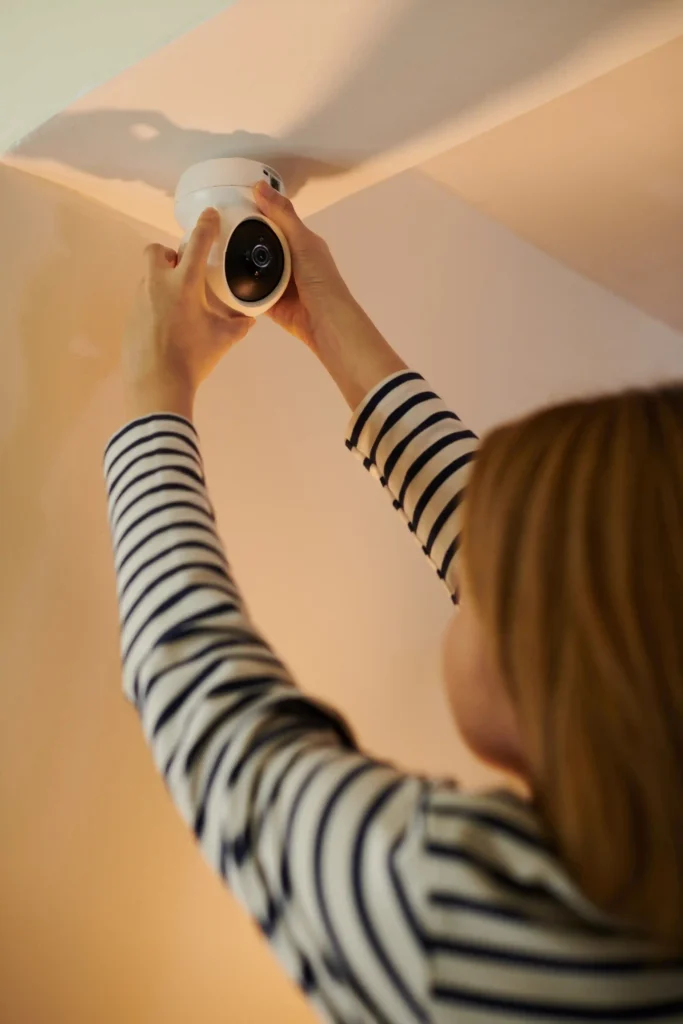
2. Mount the Cameras
Start by unboxing your equipment and charging batteries (if applicable). Then:
- Use the included hardware to mount your cameras securely
- Angle them for the best view – capture faces and entry points, not just general spaces
- Keep them out of reach of tampering, but easy to access for maintenance
Follow the manufacturer’s instructions closely (each brand may vary slightly).
3. Connect to Wi-Fi
Most systems guide you through Wi-Fi setup using a mobile app. The basic process:
- Download the camera’s app
- Create an account and log in
- Follow prompts to pair each camera to your home network
- Name each camera based on its location (e.g., “Front Door,” “Backyard”)
If a camera won’t connect, check your Wi-Fi signal strength or move the router closer.
4. Install the Mobile App and Configure Settings
Once your cameras are connected, explore the app to:
- Set up motion detection zones and alerts
- Adjust recording schedules
- Enable cloud storage or insert an SD card if supported
- Integrate with your smart home security system for voice control and automation
Take time to test different settings until everything fits your routine and preferences.
5. Test Your Cameras
After setup:
- Walk in front of each camera to test motion detection
- View the live feed to ensure clear visuals and proper angles
- Confirm alerts are coming through to your phone or email
Make final adjustments to improve angles or coverage if needed.
Maintenance Tips to Keep Your Wireless Camera System Running Smoothly
To keep your DIY home surveillance system in top shape:
- Clean the lenses regularly for a clear view
- Check battery levels monthly (if applicable)
- Keep firmware updated for the latest security features
- Secure your Wi-Fi with a strong password and encryption
If issues pop up, refer to your camera’s manual or support site.
Expand Your System for Full Home Protection
Looking to boost your home’s security even more? Consider adding:
- Smart door and window sensors
- Smart locks or doorbell cameras
- Professional monitoring services that alert you or authorities if a break-in is detected
These features can turn a simple camera setup into a complete wireless home security system.
Conclusion
Installing wireless security cameras at home is a smart and practical way to protect your property and loved ones. With just a bit of planning and setup, you can enjoy peace of mind, remote access, and real-time alerts – all without the cost of professional installation.
Whether you’re new to smart home security or upgrading an older system, following this guide will help you build a setup that works for your space and budget.
FAQs: Installing Wireless Home Security Cameras
- Do wireless security cameras work without internet?
Most cameras need Wi-Fi to send alerts or footage to your phone, but some can record to SD cards locally without internet access. - How far can wireless cameras reach?
Transmission ranges vary, but most models offer up to 250–500 feet indoors. Obstacles like walls can reduce range. - Are wireless cameras secure from hackers?
Yes, if you use strong passwords, enable encryption, and keep firmware updated, your cameras are secure. - Can I install wireless security cameras outside?
Absolutely. Just make sure your cameras are weatherproof and placed under a protective cover for longevity. - How many wireless cameras do I need?
Most homes benefit from 3-5 cameras, depending on size and layout. Focus on entry points, main living areas, and blind spots.